Gluten-Free

Banana Cranberry Muffins (gluten-free)

IMG_7313

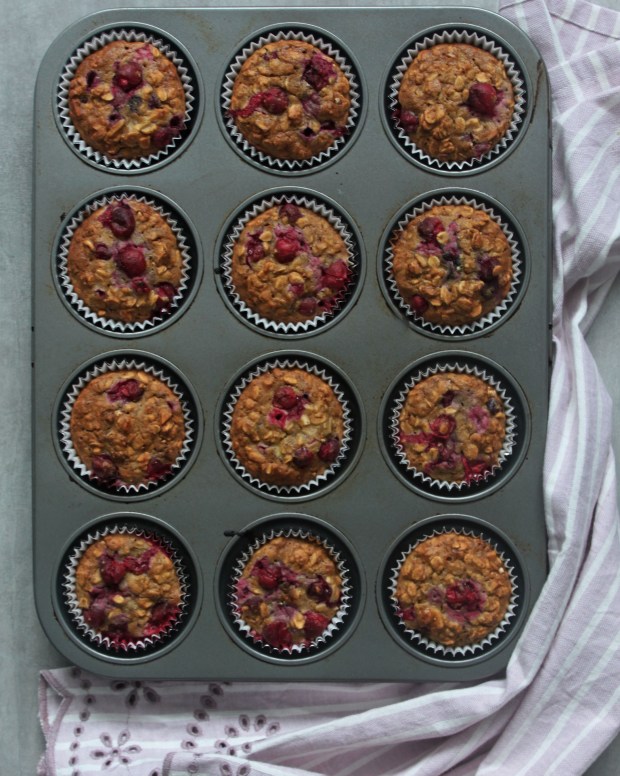
These muffins are great for breakfast. They’re moist and tart and go great with a bit of melted butter..and a bit of honey…and a cup of coffee..or tea, I don’t wanna limit you 🙂

for 15 muffins, you will need

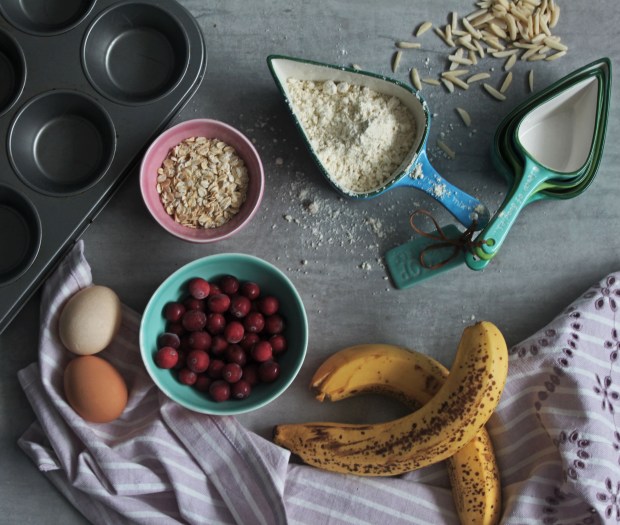
2 ripe bananas, mashed

2 eggs

1/4 cup olive oil

1/3 cup coconut or almond milk

1/2 cup Erythritol (sugar substitute)

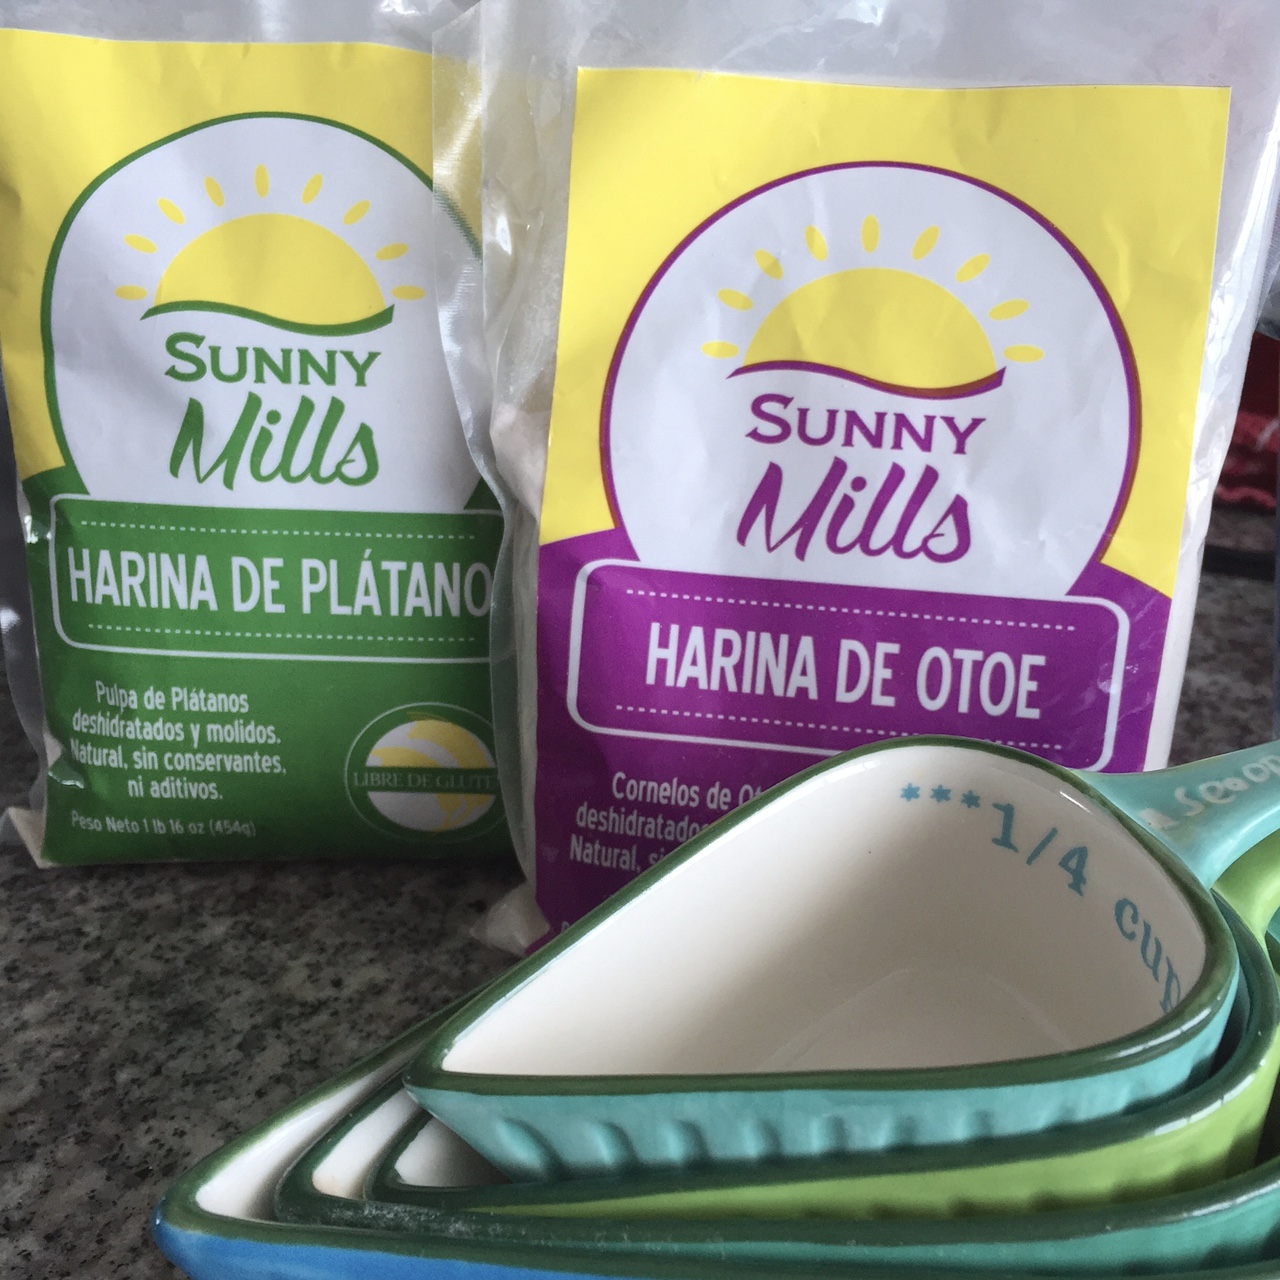
1 cup Bob’s Red Mill gluten free baking flour

1 1/2 cup gluten free oats

3 tsp baking powder

1/4 cup chopped almonds

1 cup fresh or frozen cranberries

1 tsp cinnamon

Preheat oven to 350F degrees. Line muffin pan with muffin paper cups.

IMG_7301

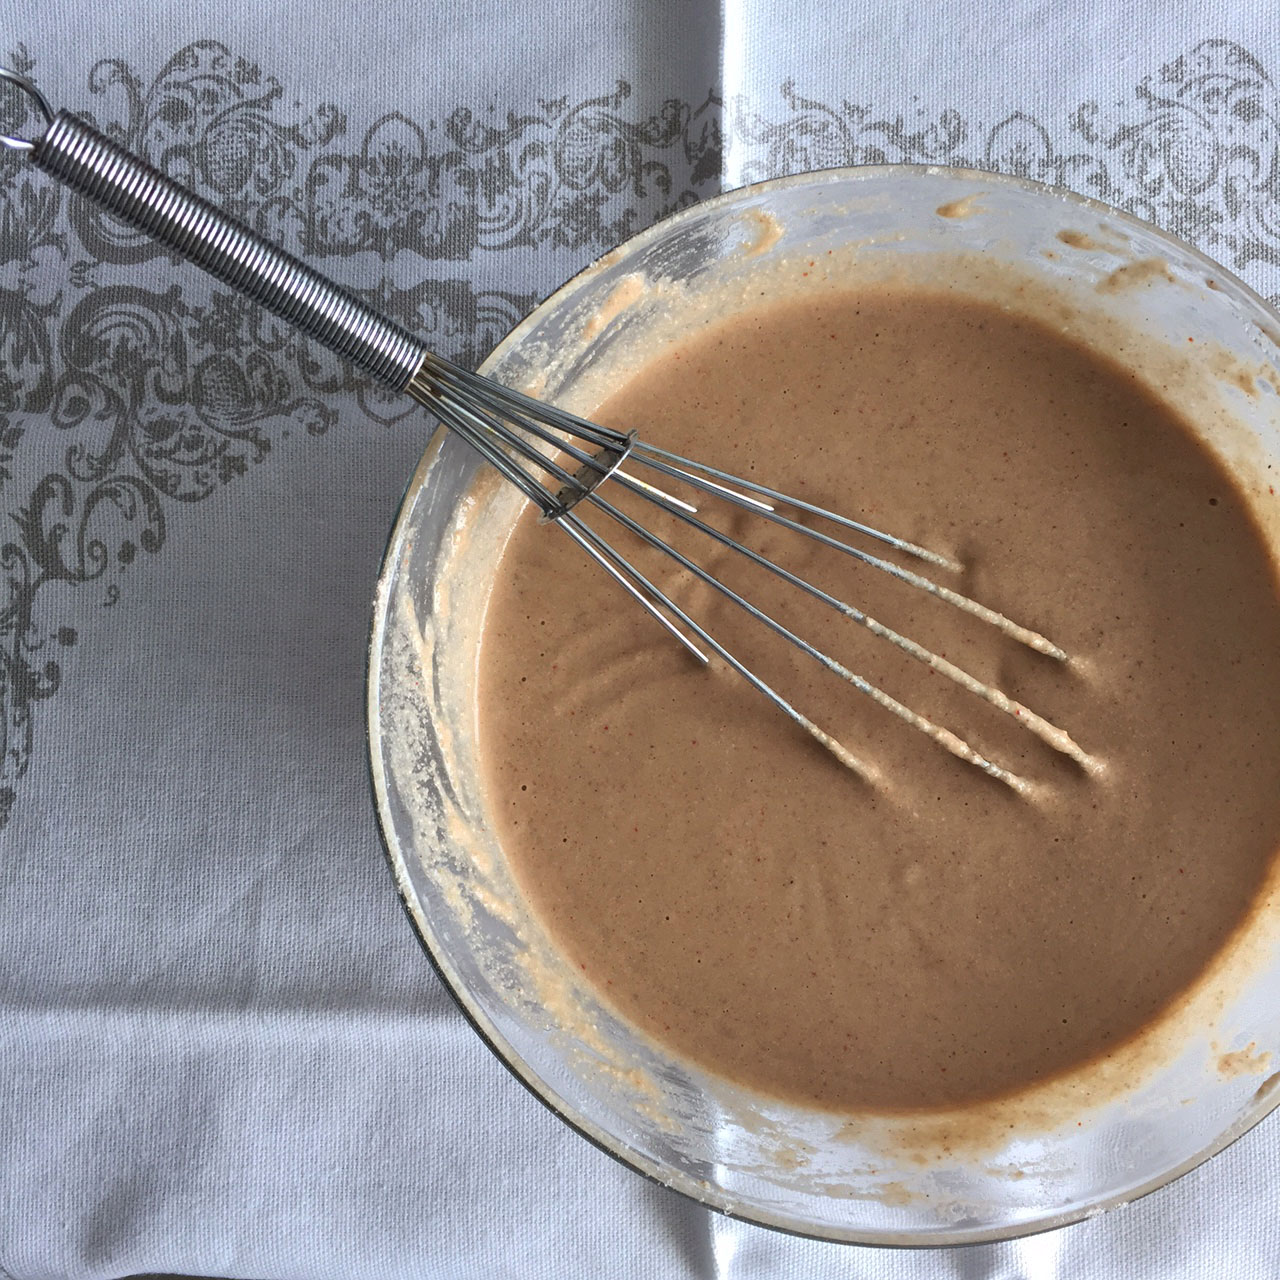
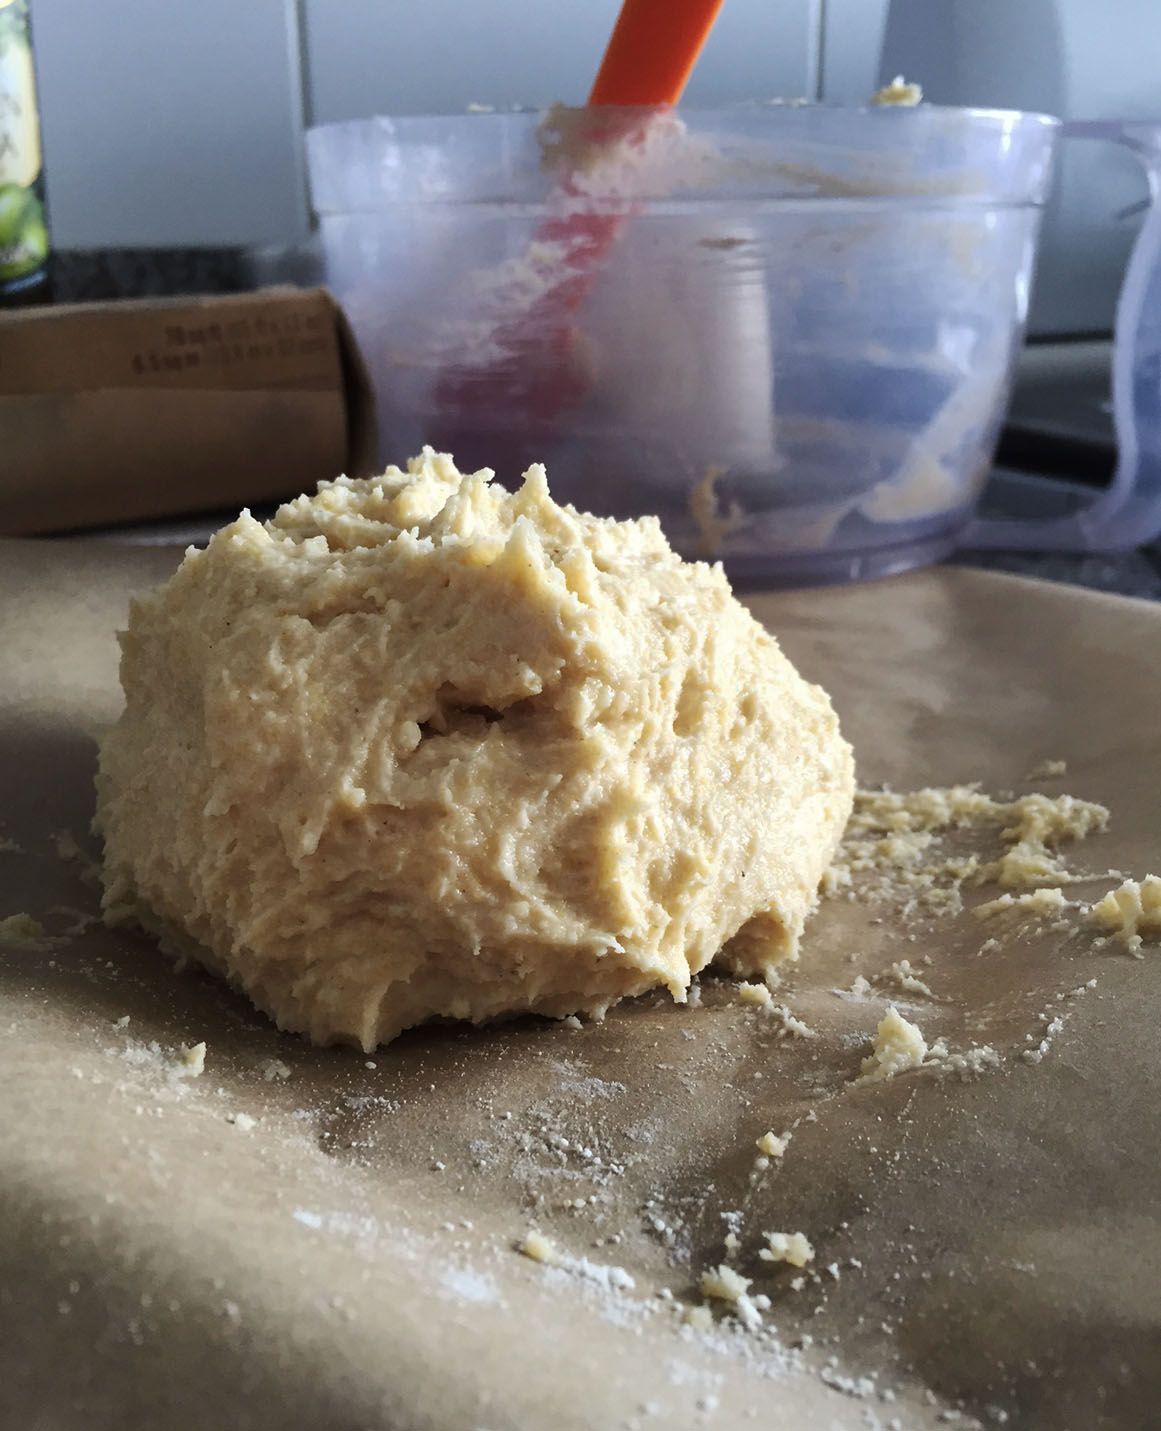
In a bowl, with a whisk, combine bananas, coconut milk, oil, erythritol and eggs. Add dry ingredients, flour, oats, cinnamon and baking powder and whisk until well incorporated. Fold in cranberries and almonds.

IMG_7306

With a spoon, fill each muffin cup 3/4 of the way. Bake for 25-30 minutes or until toothpick comes out clean when inserted in one muffin.

IMG_7325

——————————-

Estos muffins son perfectos para el desayuno. Son super suavecitos y aciditos por los arándanos. Van deliciosos con un poquito de mantequilla derretida..y miel…y una taza de cafe..o te, no te quiero limitar  🙂

para 15 muffins, vas a necesitar

2 guineos maduros, majados

2 huevos

1/4 taza de aceite de oliva

1/3 taza de leche de coco o almendra

1/2 taza de Erythritol (substituto de azúcar)

1 taza de harina para hornear gluten free marca  Bob’s Red Mill

1 1/2 taza de avena gluten free

3 cucharaditas de polvo de hornear

1/4 taza de almendras picadas

1 taza de cranberries (arandanos rojos) frescos o congelados

1 cucharadita de canela en polvo

Precalienta el horno a 350F degrees. Len el molde de muffins, coloca los copitos de papel.

En un bol, combina los guineos, leche de coco, aceite, erythritol y los huevos con un mezclador de mano. Luego agrega los ingredientes secos, harina, avena, canela y polvo de hornear y mezcla bien. Incorpora los arándanos y las almendras.

Con una cuchara, rellena cada molde de muffin hasta 3/4 de su capacidad. Hornea por 25-30 minutos o hasta que insertes un palillo en un muffin y salga limpio.

Quinoa salad (gluten-free)

IMG_7295

This salad is a great lunch option if you are on the run. It took me only 20 minutes to prepare it this morning, when I realised I hadn’t prepared lunch for my husband to take to work (he’s in a detox diet and if he leaves the house without lunch, he’ll make the worst take out choices)

This recipe can yield 2 sensible portions or 1 big portion for a hungry male adult 😛

1/2 cup black royal quinoa (or the type you have at hand)

1 cup water

1 tablespoon coconut oil

1 tsp garlic powder

1 tsp salt

1 can white albacore tuna (low sodium, packed in water)

1/2 seedless cucumber, diced

1/2 small red onion, cut in julienne

2 tbsp finely diced olives

2 tbsp corn

1/4 cup white farmers cheese, crumbled (you can skip the cheese if you wanna keep it clean or vegan)

For the dressing: Mix 2 tbsp olive oil, 1/2 tsp sumac, juice from 1 lemon, salt & pepper to taste.

Preparation

Wash the quinoa well. in a pot heat up the coconut oil and add the quinoa, water, garlic powder and salt. Stir well only once and let the water boil for 5 minutes. Lower the flame and cover the pot.

Meanwhile prepare all the other ingredients.

When water has evaporated, turn off the heat and place quinoa in a mixing bowl and let cool down for a couple of minutes. Add the olives, corn, onion, cucumber, cheese and dressing. Mix well with a fork. This salad is served cold.

———————————–

Esta ensalada es una super buena opcion de almuerzo si estas en corredera. Me tomo solo 20 minutos prepararla esta mañana cuando me di cuenta que no habia hecho nada para que mi esposo se llevara de almuerzo al trabajo (anda en un detox y si se va de la casa sin el almuerzo, va a tomar la peor decision a la hora de pedir comida a domicilio)

Esta receta puede rendir para 2 porciones sensibles o 1 porcion grande para un hombre adulto con hambre 😛

1/2 taza de black royal quinoa (o la que tengas a mano)

1 taza de agua

1 cucharada de aceite de coco

1 cucharadita de ajo en polvo

1 cucharadita de sal

1 lata de atun white albacore (bajo en sodio, en agua)

1/2 pepino sin semillas, cortado en cubitos

1/2 cebolla morada chica, en julianas

2 cucharadas de aceitunas cortadas en rebanadas

2 cucharadas de maíz en lata

1/4 taza de queso del pais, desmenuzado (puedes saltarte el queso si quieres mantener la receta “limpia” o vegana)

Para el aderezo: Mezcla 2 cucharadas de aceite de oliva, 1/2 cucharadita de sumac, jugo de 1 limon, sal & pimienta al gusto.

Preparacion

Lava bien la quinoa. En una olla, calienta el aceite de coco y agrega la quinoa, agua, ajo en polvo y sal. Mezcla bien solo una vez y deja que el agua hierva por 5 minutos. Baja el fuego y tapa la olla.

Mientras tanto prepara todos los demás ingredientes.

Cuando se ha evaporado el agua, apaga el fuego y pon la quinoa en un bol para que se enfrie por unos minutos. Agrega las aceitunas, el maiz, la cebolla, el pepino, el queso y el aderezo. Mezcla bien con un tenedor. Esta ensalada se sirve fria.


Butternut Squash & Coconut soup

IMG_7268

I started this super cool food styling course, and I had an assignment today on taking picture of a soup! with and without ingredients in the shot. After much thought I decided to make this butternut squash soup (cause I had a craving and also cause it has a beautiful color). And the contrast of the flavours in just yummy.

2 cups of butternut squash, peeled and cubed

2 tablespoons coconut oil

3 cloves garlic, minced

1 tablespoon ginger powder

1 teaspoon cumin

1 teaspoon cayenne pepper

1 can of coconut milk

1 cup of water

salt to taste

chopped scallions for garnish

Heat up the oil in a pot and add garlic. Toss for a minute. Add the butternut squash, ginger powder, cumin and cayenne pepper, salt to taste and mix well.

Add the coconut milk and water and wait until it boils to turn the heat down and cover the pot for 20 minutes, or until the squash is soft.

Turn the heat off and blend the soup with a hand blender or in small batches in a regular blender. Garnish with chopped scallions.

IMG_7271

———————————-

Empece este curso super cool de estilismo culinario y hoy me pusieron una tarea de tomarle foto a una sopa, con ingredientes y sin ingredientes en la imagen. Despues de meterle mucha cabeza decidi hacer una sopa de calabaza de mantequilla (porque me provocaba muchisimo y tambien porque tiene un color bello). Y el contraste de sabores es deli.

IMG_7279

2 tazas de calabaza de mantequilla, pelada y cortada en cubos

2 cucharadas de aceite de coco

3 dientes de ajo machacados

1 cucharada de jengibre en polvo

1 cucharadita de comino

1/2 cucharadita de pimienta cayena

1 lata de leche de coco

1 taza de agua

sal al gusto

cebollina picadita para decorar

Calienta el aceite en una olla y agrega el ajo machacado. Revuelvelo por un minuto. Agrega la calabaza, el jengibre en polvo, comino, y pimienta cayena, sal al gusto y mezcla bien.

Agrega la leche de coco y el agua y espera a que hierva para bajar el fuego y tapar la olla. Cocina la sopa tapada por 20 minutos o hasta que la calabaza este suave.

Apaga el fuego y procesa la sopa en una crema (con un blender manual o en la licuadora, en pequenas porciones). Sírvela y decorala con cebollina picadita.

Savoury Pancakes (Gluten-Free, Vegetarian)

IMG_7274

Since I did Dr. Junger’s CLEAN detox, I’ve been thinking of more ways to have a gluten free diet (the dairy is still difficult to eliminate from my life, but one ingredient at a time people :P), so the other day I bought these local gluten free flours made from taro root and plantain and I really did not know how to use them.

IMG_7276

This morning i felt like experimenting with them and was pleasantly surprised with the results! Just using some intuition and whatever I had in my fridge and pantry, these were born. Althought I had them for breakfast, this recipe can be made for any meal. If you can’t find these flours, try any other combination of vegetable flours that you can get a hold of

For the pancakes

1 cup of taro root flour

1/2 cup of plantain flour

1 cup of hot water

2 eggs, beaten

1 tsp of salt

1 tsp of smoked paprika

1 tsp of garlic powder

1 tbsp of coconut oil

non-stick oil in spray

For the filling

3 tbsp of chimichurri sauce

1 small shallot, finely chopped

2 cups cremini mushrooms, roughly chopped

2 cups arugula

salt and pepper to taste

Crumbled Feta cheese for garnish

In a bowl, mix the 2 flours, add salt, paprika and garlic powder. Ina separate bowl, mix the eggs and add to the dry ingredients. Add the warm water and coconut oil and mix well until smooth.

IMG_7267

Heat up a skillet and spray it with the canola oil. Pour the mix with a spoon and turn the skillet side to side, so the mixture distributes well. Cook for 2 minutes, or until the pancakes are bubbling and with a big spatula flip the pancake. Cook for 2 more minutes. Repeat this with the rest of the batter. Put the pancakes aside (you can put them in the oven in 200 degrees so they can keep warm).

In a separate skillet, heat up the chimichurri sauce and add the shallots. Cook them around 3 minutes. Add the mushrooms, salt and pepper to taste and mix well with the chimichurri. After 3 minutes, add the arugula leaves and mix well for around 1 minute. Turn the heat off.

Now its time to assemble it all! Put one pancake in a plate, pour the filling mix on top of it and sprinkle feta cheese on top. Top with a second pancake and more filling and feta cheese. I don’t know how i couldn’t think of this before!

—————————————

Desde que hice el detox CLEAN del Dr. Junger, he tratado de pensar en maneras de tener una dieta libre de gluten (todavía no estoy ahi con los lácteos, un ingrediente a la vez gente :P), asi que el otro día compre estas harinas locales y gluten free, hechas de platoon y otoe y no sabia mucho que hacer con ellas. Esta mañana tuve ganas de experimentar y tuve una agradable sorpresa con los resultados! Armada con un poco de intuicion y lo que habia en mi nevera, nacieron estas delicias. Aunque las comi en el desayuno, esta receta puede aplicar para cualquier comida. Si no encuentras estas harinas, trata con cualquier otra combinacion de harinas de vegetales que puedas conseguir.

Para los pancakes

1 taza de harina de otoe

1/2 taza de harina de platano

1 taza de agua tibia

2 huevos, batidos

1 cucharadita de sal

1 cucharadita de paprika

1 cucharadita de ajo en polvo

1 cucharada de aceite de coco

aceite en spray

Para el relleno

3 cucharadas de salsa chimichurri

1 chalote finamente picado

2 tazas de hongos cremini, picados

2 tazas de arugula

sal y pimienta al gusto

queso Feta desmoronado para coronar

En un bol, mezcla las 2 harinas, agrega sal, paprika y ajo en polvo. En un bol separado mezcla los huevos y agregalos a los ingredientes secos. Agrega el agua tibia y el aceite de coco y mezcla bien hasta que la masa este suave. Calienta un sarge a fuego medio y rocialo con el aceite de canola en spray. Con una cuchara vierte un poco de la mezcla en el sarten y muevelo de lado a lado para que la mezcla se distribuya uniformemente. Cocinalo por 2 minutos, o hasta que salgan burbujas a la mezcla. Con una spatula dale la vuelta al pancake y dejalo cocinar 2 minutos mas.  Repite este procedimiento con el resto de la mezcla. Ponlos a un lado, si quieres metelos al horo a 200 grados para que se mantengan tibios.

En un smarten aparte, calienta la salsa de chimichurri y agregate los chalotes. Dejandolos cocinar por 3 minutos. Agrega los hongos, sal y pimienta al gusto y revuelve bien para que se mezclen con la salsa. Despues de 3 minutos, agrega las hojas de arugula y revuelvelas por 1 minuto. Apaga el fuego.

Ahora llego el momento de armarlos. Pon un pancake en un plato, viertele un poco de la mezcla de hongos y arugula, espolvoreales queso feta. Ponle un segundo pancake encima y repite la operacion.

No se como no se me ocurrio esto antes!

Nori & Asian Cashew Cream Snacks (Gluten Free)

IMG_7159

I love these snacks. They take time to prepare (and have a lot of ingredients). There is a lot of restriction not to get out of bed in the middle of the night and take them out of the dehydrator and eat them just like that…but if you do  wait till the next morning, your house not only will smell amazing, but you’ll have the best mid morning snacks (clean and gluten free) and virtually guilt free…if you can make it to mid morning 😛

Ingredients

1 1/2 cup cashews

1 tbsp Miso paste

1/4 tsp sesame oil

Juice of 1 lemon

1/4 tsp cayenne pepper

1 tsp salt

3 tbsp water

1 tbsp olive oil

1 tbsp nutritional yeast flakes

1 tsp soy sauce

1 tsp ground ginger

5 small sweet peppers (without seeds)

5 nori seaweed sheets

Toppings: sesame seeds & 1 chopped leek

IMG_7170

In a high speed blender mix the first 12 ingredients until they make a smooth paste.

Place Nori sheets on top of ta dehydrator tray with the textured side up (I can fit 2 nori sheets in 1 dehydrator tray). With a spatula, take some of the cashew mixture and place it in the center of the nori sheet and gently slide it to the borders of the nori, until is all well coated. Try not to make a thick layer of cream, or it will take longer to dehydrate. sprinkle with chopped leeks and black sesame seeds. Repeat procedure with the rest of the nori sheets. Place the trays in the dehydrator and set it up in 135 overnight (at least 8 hours). I use this setting in Panama cause it has a very humid weather.

When ready take them out of the dehydrator and cut the nori sheets into strips, to make them bite size.

——————————————–

Amo estos snacks. Toman tiempo de preparar y abundancia de ingredientes (aunque tenia todos en mi despensa). Hay mucha restriccion involucrada para no pararte en la mitad de la noche y sacarlos del deshidratador para comertelos tal cual…pero si llegas a esperar hasta la mañana siguiente, tu casa no solo olera a gloria, sino que tendras los mejores snacks de media mañana (limpios y sin gluten) y virtualmente libres de culpa…si puedes esperar hasta media mañana  😛

Ingredientes

1 1/2 taza de pepitas de maranon

1 cucharada de pasta Miso

1/4 cucharadita de aceite de ajonjoli

Jugo de 1 limon

1/4 cucharadita de pimienta cayena

1 cucharadita de sal

3 cucharadas de agua

1 cucharada de aceite de oliva

1 cucharada de levadura nutricional en hojuelas (nutritional yeast)

1 cucharadita de salsa de soya

1 cucharadita de jengibre en polvo

5 ajies dulces rojos (sin semillas)

5 hojas de alga nori

Toppings: semillas de ajonjoli negro & 1 puerro cortado en media lunas (la parte blanca)

En una licuadora de alta velocidad, mezclar los 12 primeros ingredientes hasta lograr una pasta suave.

Pon las hojas de Nori en una bandeja del deshidratador (me caben 2 hojas por bandeja). Con una espatula, toma un poco de la pasta que acabas de hacer y colocala en el centro de la hoja de nori y esparcela suavemente hacia los bordes hasta cubrir la hoja completa. Trata de no hacer una capa my gruesa o se va a demorar mas tiempo en deshidratarse. Espolvoreales encima el puerro picadito y las semillas de ajonjoli. Repite con el resto de las hojas de Nori. Ponlas en el deshidratador a 135 toda la noche (al menos 8 horas). Uso ese setting en Panama por el clima tan humedo.

Cuando eaten listas , sacalas del deshidratador y corta las hojas de Nori en tiras tamano snack.

Heirloom Tomato & Goat cheese Galette (Gluten Free)

Yield 1 galette (I doubled the recipe to make 2 units)

IMG_6658

I bought these beautiful Heirloom tomatoes with this recipe in mind. This was my first time making galettes and they came out delicious, so worth trying this one out!

IMG_6576

Ingredients

3/4 cup all purpose gluten-free flour blend

1/4 cup yellow cornmeal

1/4 cup almond meal

4 tablespoons chilled unsalted butter, cut into small cubes

1/2 tsp salt

3 tbs ice water

2 heirloom tomatoes cut in thin slices

black pepper to taste

2 tbsp of fresh thyme

1 medium shallot cut in thin slices

drizzle of olive oil

1/2 cup crumbled goat cheese

Instructions

Combine flour, almond meal and cornmeal and salt and butter into food processor. Process until the mix looks like a course meal. While the processor us running, add in your ice water through the chute at the top of the machine. Process the mix until it is just combined.

IMG_6645

Take out the mix, make a ball and wrap it up in parchment paper and put it in the refrigerator for 30 minutes.

Preheat your oven to 425 degrees.

Cut the heirloom tomatoes and shallots. Put them in a bowl and add salt and pepper to taste, the thyme and a drizzle of olive oil. Mix well.

IMG_6650

After 30 minutes, unwrap the dough. Place another piece of parchment paper on top of your dough ball. Roll out a circle using a rolling pin or what you have at hand (I used a wine bottle). Make sure the dough is thin but not so thin, so it doesn’t stick to the parchment when you want to roll the edges.

Remove the top piece of parchment paper and arrange your tomatoes and shallots on top of the dough, leaving an inch and a half border of dough around the tomatoes.

IMG_6651

Sprinkle the tomatoes with goat cheese and carefully fold the edges of your dough over to partially cover the tomatoes.

Slide the parchment paper that is holding the galette onto a baking pan. Bake for 25 minutes or until the crust is golden brown.

—————————————————————–

IMG_6652

Galettes de tomates Heirloom & queso de cabra (Gluten Free)

Rinde 1 galette (dupliqué la receta para hacer 2 galettes)

Compré estos tomates heirloom hermosos con esta receta en mente. Fue mi primera vez haciendo galettes y salieron deliciosos, asi que vale la pena intentar esta receta!

Ingredientes

3/4 taza de harina gluten free todo proposito

1/4 taza de harina de maiz

1/4 taza de harina de almendras

4 cucharadas de mantequilla fria, cortada en cubitos

1/2 cucharadita de sal

3 cucharadas de agua fria

2 tomates heirloom cortados en finas lascas

pimienta negra al gusto

2 cucharadas de tomillo fresco

1 shalote mediano cortado en finas lascas

chorrito de aceite de oliva

1/2 taza de queso de cabra desmenuzado

Instrucciones

Combina la harina gluten free, la harina de almendra y de maiz, sal y mantequilla en un procesador de alimentos. Procésalo hasta que la mezcla se vea rustica. Mientras el procesador esta andando agrega el agua por la parte de arriba de la tapa del procesador y deja que se incorpore bien a la mezcla

Saca la masa y haz una bola y envuelvela en papel pergamino. Ponla en el refrigerador por 30 minutos.

Precalienta el horno a 425 grados.

Corta los tomates heirloom y los shalotes. Ponlos en un bol y agrega sal y pimienta al gusto, el tomillo y un chorrito de aceite de olive. Mezclalos bien.

Transcurridos los 30 minutos, abre el papel pergamino y pon otro pedazo de papel pergamino sobre la masa. Con un rodillo, o lo que tengas a mano (yo use una botella de vino), aplasta la masa suavemente hacia todas direcciones hasta que se haga una masa delgada (no tan delgada para que no se pegue el papel pergamino cuando la vayas a doblar en los bordes).rea los tomates con queso de cabra y con cuidado dobla los bordes de la masa alrededor de los tomates.

Con cuidado pon el papel pergamino con la galette sobre una bandeja de hornear y hornea por 25 minutos o hasta que la masa este dorada.

Mini Salmon quiches (Gluten-Free)

photo-2

Ingredients

Yields 10 mini quiches

1 small shallot super finely chopped

100 g smoked salmon (lox), cut in small pieces

½ cup of your favorite cheese chopped ( i used a mix of farmers cheese and jalapeño white cheddar)

5 eggs

½ cup almond flour

1/2 cup hazelnut milk

1 tsp dill

Salt and pepper to taste

Instructions

Pre-heat oven at 350.

Mix well all the ingredients in a bowl.

Grease the tins in a cupcake baking tray and pour the mixture in. Put in the oven and cook for around 10 minutes or until you insert a knife and it comes out clean.

Ingredientes

1 shallot pequeño picado súper finito

100gr de salmón ahumado cortado en piezas pequeñas

½ taza de tu queso favorito (yo use queso prensado mezclado con cheddar blanco de jalapeños)

5 huevos

12 taza de harina de almendras

½ taza de leche de avellanas sin endulzar

1 cucharadita de eneldo

sal y pimienta al gusto

—————————————-

Instrucciones

Pre-calentar el horno a 350

Mezcla bien todos los ingredientes en un bol.

Engrasa los moldes de una bandeja de hacer cupcakes y divide la mezcla entre 10 moldecitos. Introduce al horno y cocínalos por aproximadamente 10 minutos, o hasta que insertes un cuchillo y salga limpio.

Cannellini Bean Dip

photo-2

  • 1 can of Cannellini beans, drained (reserve 2 tbsp of liquid)
  • 1 garlic glove
  • ¼ cup of extra virgin olive oil
  • 1 tbsp. Lemon juice (meyer lemon)
  • 1 tsp. Fresh thyme
  • salt & cayenne pepper to taste
  • Put all ingredients in a food processor until it becomes a smooth blend. Adjust salt if needed

———————————————————-

Dip de frijoles blancos

  • 1 lata de frijoles blancos (cannellini), drenados (separa 2 cucharadas del liquido)
  • 1 diente de Ajo
  • ¼ taza de aceite de olivo extra virgen
  • 1 cucharada de jugo de limón amarillo
  • 1 cucharadita de tomillo fresco
  • sal y pimienta cayena al gusto

Almond Pancakes with Chocolate Hazelnut Butter and Blueberries (gluten-free)

photo 1

Don’t get fooled by the Picture! These are not as sweet as they look

Ingredients

  • 3 large eggs
  • 1 tablespoon almond milk
  • 1 tablespoon vanilla extract
  • 2 tablespoons date syrup (or you can use agave)
  • 1 ½ cups blanched almond flour
  • ¼ teaspoon himalayan pink salt
  • 1 teaspoon baking powder
  • Canola oil in spray for cooking
  • 1 cup of frozen blueberries with 1 tablespoon of water
  • Chocolate hazelnut butter to taste

Instructions

In a large bowl whisk together eggs, water, vanilla and date syrup

Add almond flour, salt and baking powder and mix until well combined

Spray skillet with canola oil over medium heat

Scoop 1 tablespoon of batter onto the skillet (you can fit as much as 3 pancakes per batch)

Pancakes will form little bubbles, then flip pancakes over and cook other side

Remove from heat to a plate or place inside the warm oven

Repeat process with remaining batter, add more oil to skillet as needed

Heat up in a small pot the blueberries with the tablespoon of water until it forms a sauce.

Serve the pancakes on top of each other, layering them with the chocolate hazelnut butter and topping them with the blueberries. Happy Sunday!

——————————————————

Pancakes de Almendras con Mantequilla de Avellanas y Chocolate y Blueberries

No se enganen con la foto, no son tan dulces como parecen!

Ingredientes

  • 3 huevos
  • 1 cucharada de leche de almendras
  • 1 cucharada de extracto de vainilla
  • 2 cucharadas de sirope de dátil (o agave)
  • 1 ½ tazas de harina de almendras
  • ¼ cucharadita de sal rosada del Himalaya
  • 1 cucharadita de polvo de hornear
  • Aceite de Canola en spray
  • 1 taza de blueberries congelados 1 una cucharada de agua
  • Mantequilla de avellanas y chocolate al gusto

Instrucciones

En un bol grande mezcla los huevos, agua, vainilla y sirope de dátil

Agrega la harina de Almendras, sal y polvo de hornear hasta que sea una mezcla homogénea

Rocía la sartén con el aceite de canola a fuego medio

Agrega una cucharada grande de la mezcla en la sartén para formar los pancakes (caben hasta 3 cucharadas por tanda)

Cuando los pancakes hagan burbujitas dales la vuelta y cocínalos del otro lado

Retíralos del calor y ponlos en un plato o en el horno a temperatura baja

Repite el procedimiento con el resto de la mezcla y agrega mas aceite de ser necesario

En una ollita calienta las blueberries con el agua y déjalo cocinando unos 6 minutos hasta que se haga como una salsita.

Sirve los pancakes uno encima del otro poniéndoles una capa de la mantequilla de avellanas y chocolate entre cada uno y sirviendo las blueberries encima. Feliz Domingo!

Cooking & Photoshooting

photo 2

photo 1

photo 3

The other day I had the pleasure of collaborating in a photo shoot for a local magazine (Punto y Coma). They asked me to create 5 recipes that were gluten free. It was an amazing and challenging experience, since I wanted to give them something that would be both visually appealing and at the same time easy to make and yummy!

photo 5

I had so much fun that day 🙂 Here are some behind the scenes pics of the shoot…to be continued…

—————————————

El otro dia tuve el placer de colaborar en una sesion de fotos para una revista local (Punto y Coma). Me pidieron crear 5 recetas sin gluten. Fue una experiencia increible y retadora, ya que les queria dar algo que fuera visualmente atractivo a la vez que fácil de hacer y rico!!

photo 4

unnamed-1

Fue un dia tan divertido 🙂 Aquí les comparto algunas de las fotos detrás de las cámaras…continuara….