Parve

Matcha & Coconut “Panna Cotta” (Vegan, Gluten Free, Sugar Free)

IMG_9707

I love Panna Cotta, like a lot. My husband and I discovered this small Italian restaurant were they serve the best Panna Cotta ever and we even order it in other places when we travel to see if they stand up to it. None have yet! This is how obsessed we are with this dessert.

I wanted to try a version that was vegan and sugar free, specially sugar free. This is what happened when I started experimenting.

Ingredients (4 servings)

2 cups coconut milk

1/2 teaspoon vanilla extract

2 tsp Agar Agar powder (gelatin obtained from algae)

1 tablespoon matcha tea powder

1/4 cup coconut oil

3 tbsp coconut nectar

In a small pot mix the coconut milk and agar agar. Let rest for 5 minutes. Then add vanilla and turn the heat on and simmer. Turn the heat to low and cook for about 8 minutes and then remove from heat.

In a small bowl mix the matcha powder with the coconut nectar  and coconut oil. Add to the milk and mix well. Pour the mixture into 4 ramekins or cupcake moulds (I used silicone moulds). Refrigerate for 2 hours. Turn them upside down and remove from moulds. Serve them on top of strawberry sauce (for the sauce just mix 1/4 cup chopped strawberries with 2 tbsp water and 2 tbsp stevia (or your sweetener of preference) and cook it until sauce has reduced and has a thicker consistency.

——————-

Amo la Panna Cotta, mucho. Mi esposo y yo descubrimos este restaurante Italiano donde sirven la mejor Panna Cotta e incluso la pedimos en otros lugares cuando viajamos para compararla con esa. Ninguna le gana todavía! Así de obsesionados estamos con el postre.

Quería hacer una version vegana y sin azúcar, especialmente sin azúcar. Esto es lo que ocurrió cuando empece a experimentar.

Ingredientes (4 porciones)

2 tazas de leche de coco

1/2 cucharadita de extracto de vainilla

2 cucharaditas de polvo de Agar Agar powder (gelatina obtenida de algas)

1 cucharada de polvo de te verde matcha

1/4 cucharada de aceite de coco

3 cucharadas de nectar de coco

En una olla chica mezcla la leche de coco y el agar agar. Deal reposar por 5 minutos. Luego agrega vainilla y prende el fuego, cocínalo hasta que empiece a hervir, luego baja el fuego y déjalo cocinar unos 8 minutos mas. Apaga el fuego.

En un bol aparte mezcla el te verde en polvo, con el nectar de coco y el aceite de coco. Agrega esto a la leche y mézclalo bien. Vierte la mezcla sobre 4 ramekins o moldes de cupcakes (yo use de silicon). Refrigera por 2 horas. Desmoldalas y sírvelas sobre una salsa de fresas (para la salsa solo mezcla 1/4 taza de fresas picaditas, con 2 cucharadas de agua y 2 cucharadas de stevia y cocina a fuego medio hasta que el liquido se haya reducido y tenga una consistencia mas espesa).


Challah with sun dried tomatoes

IMG_9620

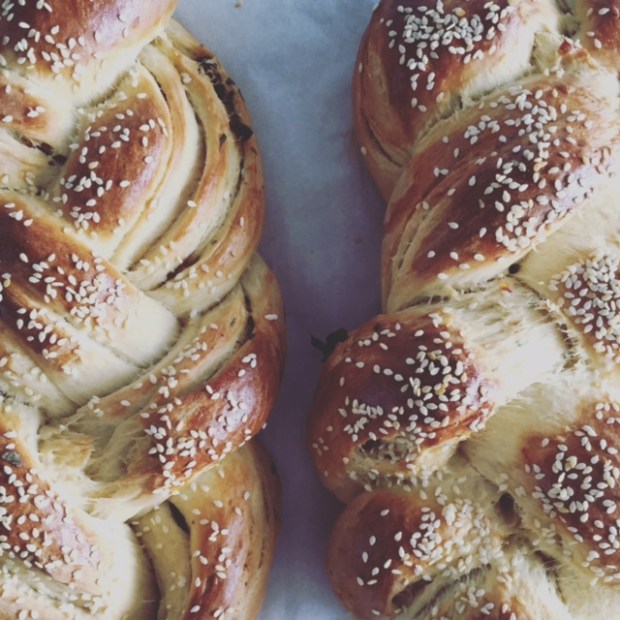
Ohh challah! how much I love thee 🙂

The only time during the week in which we eat bread is on shabbat (and sometimes if there is leftover challah, then sunday brunch is the perfect excuse to finish it). So I felt like baking this shabbat and looked for a lot of recipes online. After much research I mixed two recipes to make Challah with sun dried tomatoes and fresh oregano. It was heavenly. I never saw a bread disappear so fast in front of my eyes.

Ingredients (yields 2)

2 teaspoons active dry or instant yeast

1 cup lukewarm water

4 to 4 1/2 cups all-purpose flour

1/4 cup brown sugar (white is ok too)

2 teaspoons salt

2 large eggs

1 large egg yolk (reserve the white for the egg wash)

1/4 cup vegetable oil

1/4 cup sun dried tomatoes in oil

2 tbsp fresh oregano, chopped

Sesame Seeds for topping

Instructions (This recipe was entirely made by hand, since I don’t have a bread mixer, so anyone can do it!)

Sprinkle the yeast over the water in a small bowl, and add a healthy pinch of sugar. Stir to dissolve the yeast and let stand until you see a thin frothy layer across the top (it shows its active).

Whisk together 4 cups of the flour, sugar, and salt in a separate bowl.

IMG_9608

Make a well in the center of the flour and add the eggs, egg yolk, and oil. Whisk these together to form a slurry, pulling in a little flour from the sides of the bowl.

IMG_9610

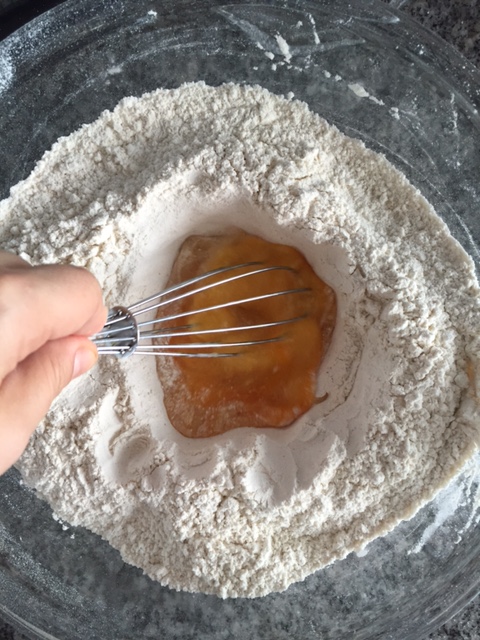
Pour the yeast mixture over the egg slurry. Mix the yeast, eggs, and flour with a long-handled spoon until you form a shaggy dough that is difficult to mix.

IMG_9611

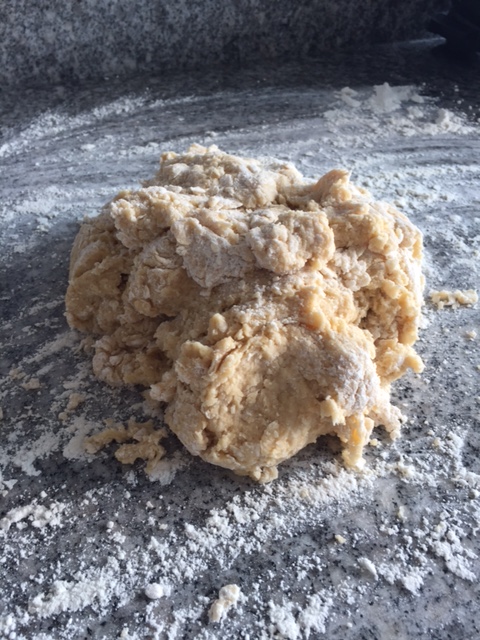
Turn out the dough onto a floured work surface and knead by hand for about 10 minutes. If the dough seems very sticky, spray a little oil until it feels tacky.The dough has finished kneading when it is soft, smooth, and holds a ball-shape.

IMG_9613

Place the dough in an oiled bowl, cover with plastic wrap, and place somewhere warm. Let the dough rise until doubled in bulk, 1 1/2 to 2 hours.

IMG_9614

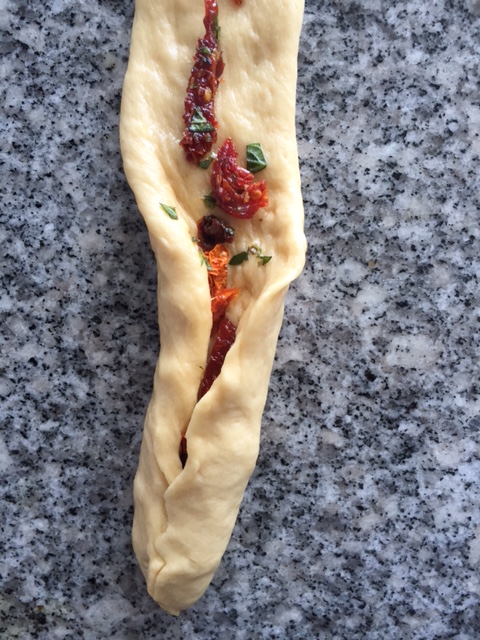
Separate the dough into six equal pieces. Roll each piece of dough into a long rope roughly 1-inch thick and 16 inches long. With your fingers flatten the ropes and put the sun dried tomatoes and oregano in the center.

IMG_9615

Close the ropes and roll them again, so they are tight and filled with the sun dried tomato oregano mix.

IMG_9617

Gather 3 ropes and squeeze them together at the top. Braid the ropes together like braiding hair or yarn and squeeze the ends together when complete (repeat with the other 3 for the second challah). Line a baking sheet with parchment and lift the loaves on top. Sprinkle the loaves with a little flour and drape it with a clean dishcloth. Place the pan somewhere warm and away from drafts and let it rise until puffed and pillowy, about an hour.

About 20 minutes before baking, heat the oven to 350°F. When ready to bake, whisk the reserved egg white with a tablespoon of water and brush it all over the challah and sprinkle with sesame seeds.

Slide the challah on its baking sheet into the oven and bake for 30 to 35 minutes, rotating the pan halfway through cooking. The challah is done when it is deeply browned and registers 190°F in the very middle with an instant-read thermometer. Let the challah cool on a cooling rack until just barely warm. Enjoy!

IMG_9619

————————–

Ohh challah! como te amo 🙂

La unica vez en la semana que comemos pan es en shabbat (y aveces si sobra challah, es la excusa perfecta para acabarla en el brunch del domingo). Esta semana tenia ganas de hornear pan asi que me puse a buscar recetas online. Despues de mucha investigation, mezcle 2 recetas para hacer challah de tomates secos y oregano fresco. Quedo como caida del cielo. Nunca vi un pan desaparecer tan rapido frente a mis ojos.

Ingredientes (para 2 panes)

2 cucharaditas del levadura activa

1 taza de agua tibia

4 to 4 1/2 tazas de harina todo proposito

1/4 taza de azúcar morena (blanca también esta ok)

2 cucharaditas de sal

2 huevos grandes

1 yema de huevo (reserva la clara para el “egg wash”)

1/4 taza de aceite vegetal

1/4 taza de tomates secos en aceite

2 cucharadas de oregano fresco, picado

Semillas de ajonjolí para decorar

Instrucciones (esta receta es completamente hecha a mano porque no tengo un mixer, así que cualquiera la puede hacer)

Espolvorea la levadura sobre el agua en un bol pequeño y agrega una pizca de azúcar. Revuelve para disolver la levadura y déjala hasta que se forme una capa espumosa en la superficie (esto demuestra que la levadura esta activa).

En un bol grande mezcla 4 tazas de harina, azúcar y sal. Haz un hueco en el medio de la mezcla y agrega los huevos, la yema y el aceite. Bate bien los huevos, dejando que se junte un poco la harina de los lados. Agrega sobre los huevos el agua con la levadura y mézclalo todo con la harina hasta que se haga una masa seca que es difícil de mezclar.

Pon la masa en una superficie limpia y enharinada y amasala con las manos por unos 10 minutos. Si se te pega la masa a la superficie o las manos, agregale un poquito de aceite en spray. La masa esta lista cuando esta suave y se puede hacer una bola con ella. Pon la masa en un bol engrasado y tapala con papel plástico y colocala en un area calida. Deja que la masa crezca hasta doblar su tamaño, 1 1/2 – 2 horas.

Separa la masa en 6 partes iguales. Rueda la masa hasta formar una cuerda de 1 pulgada de ancho y 12 de largo. Con los dedos aplasta la cuerda y pon los tomates secos y oregano en el centro. Luego vuele a cerrar las cuerdas y enrrollalas de vuelta para que se cierren bien.

Para hacer una challah, agarra 3 cuerdas y aprietalas juntas en la parte de arriba. Trenza las cuerdas como cuando trenzas el cabello y aprietalas al final cuando termines (repite con las 3 restantes para hacer la segunda challah). Alinea una bandeja de hornear con papel pergamino y pon las challah encima. Pon la bandeja en un lugar calido sin corrientes de aire y tapalas con un trapo seco. Deja que las challahs crezcan hasta que esten gorditas, como una hora.

Unos 20 minutos antes de hornear, calienta el horno a 350°F. Cuando estes listo para hornear, bate la clara de huevo y con una brocha cubre las challah con esta mezcla y espolvoreale semillas de ajonjolí.

Introduce las challah en el horno y hornealas de 30 a 35 minutos, rotando la bandeja a los 15 minutos. Las challah estan listas cuando las veas doradas y te marque 190°F cuando introduzcas el termometro en el centro. Déjalas enfriar en una rejilla hasta que esten tibias. Disfrutalas!

Watermelon & Rose Water Ice Pops

IMG_8142

The other day I got a call from my friend Alex. He and his girlfriend Marimar (AKA urbangypsea) were developing @elpalettero, a gourmet popsicles catering business, which they were gonna launch in this super cool street market called Paseo Urbano Pty. He asked me if I would like to share with them a popsicle recipe for their launch, and I was so happy to do so!

IMG_8143

The whole experience making them was awesome. We went to Alex’s dad’s popsicle factory and made them the night before.

IMG_8145

They have these super awesome tubs with a special liquid below 20 degrees, which freeze the pops in no time.

IMG_8151

The pops were also a hit, they sold out all of their flavours the next day.

IMG_8168

Here’s my Watermelon & Rose water ice pops recipe (AKA the Sandy&Rose): yields for like 15-20 pops

3 cups of pure watermelon juice (fruit cut, blended and passed thru a sieve)

1 cup of unsweetened almond milk with vanilla flavour

1 tbsp Rose Water

4 tbsp condensed milk (for the vegan version, use agave instead)

Mix all ingredients in a blender, put in the moulds and freeze 4-8 hours. Prepare to be delighted!

IMG_8166

—————————

El otro dia me llamo mi amigo Alex. El y su novia Marimar (Alias urbangypsea) estaban desarrollando @elpalettero, un catering de paletas gourmet, el cual iban a lanzar en el mercado al aire libre Paseo Urbano Pty. Me pidió si le quería compartir una receta de paleta para el lanzamiento y estuve super feliz de hacerlo!

Toda la experiencia en hacerlas fue a otro nivel. Fuimos a la fabrica de paletas del papa de Alex y las hicimos la noche anterior a la feria. Tienen estas tinas con un liquido a menos 20 grados centígrados, las cuales congelan las paletas de una!  Las paletas también fueron un hit, se vendieron todos los sabores al día siguiente.

Aquí esta mi receta de Sandia y Agua de rosas (mejor conocida como  la  Sandy&Rose): salen como 15-20 paletas

3 tazas de jugo de sandia puro (cortar la fruta, procesarla en la licuadora y luego pasarla por un colador)

1 taza de leche de almendras con sabor a vainilla, sin endulzar

1 cucharada de agua de rosas

4 cucharadas de leche condensada (para la version vegana usa agave en vez de leche condensada)

Mezcla todos los ingredientes en una licuadora, ponlo en los moldes y congela de 4-8 horas. Preparate para esta delicia!

Red Quinoa and Mushroom burgers

IMG_7396

In solidarity with the Meatless Monday campaign, here’s the red Quinoa, Mushroom burgers recipe. I love it cause it feels light, crunchy and doesn’t have that density that veggie burgers can have when they are too starchy. You can have these with buns, but I decided to serve them with an arugula salad

1 cup water

1/2 cup red quinoa

1 tablespoon coconut oil

1 Vegetable bouillon cube

1 red diced onion

2 tbsp olive oil

salt & pepper to taste

1 ½ cups finely chopped cremini or white button mushrooms

1 teaspoon garlic powder

1 teaspoon dried oregano

1 teaspoon smoked paprika

1 egg

1/4 cup Nutritional Yeast

1/2 cup chopped walnuts

Salad Greens

Dressing: Basil Garlic Mayo

Combine, coconut oil, water, 1 vegetable bouillon cube and quinoa in a medium saucepan. Bring to a boil. Reduce to a simmer, cover and cook for 15 minutes. Remove from heat and let stand, covered, for 10 minutes. Fluff with a fork and set aside to cool.

Preheat oven to 350°F. Line a baking sheet with parchment paper.

Heat olive oil in a large saucepan over high heat. Add onion and cook, stirring frequently, until starting to soften, about 5 minutes. Add mushrooms, garlic powder, salt, pepper, smoked paprika and oregano; cook, stirring, until the mushrooms are tender, about 5 minutes. Let cool.

Beat egg in a medium bowl. Add the quinoa, mushroom mixture, nutritional yeast and walnuts; stir to combine. Make the patties with your hands and put them in the baking sheet.

Bake the burgers until crispy, 25 to 30 minutes (turning them around 20 minutes. Serve with your favorite salad and Basil Garlic Mayo (Mix chopped fresh Basil leaves, minced garlic, juice of 1 lemon and mayo to make the dressing)

————————————–

En solidaridad con la campaña  Lunes sin Carne, aquí les va la receta de las hamburguesas de quinoa roja y hongos. Me encanta porque se sienten livianas, crujientes y no tienen esa densidad almidonada que las hamburguesas vegetarianas pueden llegar a tener. Te las puedes comer con pan, pero estas las servi sobre una cama de arugula.

1 taza de agua

1/2 taza de quinoa roja

1 cucharada de aceite de coco

1 cubito de caldo vegetal

1 cebolla roja picadita

2 cucharadas de aceite de oliva

sal y pimienta al gusto

1 ½ tazas de hongos cremini o blancos, bien picadillos

1 cucharadita de ajo en polvo

1 cucharada de oregano seco

1 cucharadita de paprika ahumada

1 huevo

1/4 taza de levadura nutricional

1/2 taza de nueces picadas

Verdes de ensalada

Aderezo: Mayonesa de albahaca y ajo

Combina el aceite de coco, agua , cubit de vegetal y la quinoa en una ollita mediana. Al hervir baja el fuego y tapa la olla. Deja la quinoa cocinar aproximadamente 15 minutos. Apaga el fuego y dejala reposar por 10 minutos. Despeinala con un tenedor y dejala  enfriar.

Precalienta el horno a 350°F. Alinea una bandeja de hornear con papel pergamino.

En una sarten calienta el aceite de oliva y agrega la cebolla. Cocinala revolviendo ocasionalmente hasta que se empiece a suavizar, como unos 5 minutos. Agrega los hongos, ajo en polvo, sal, pimienta, paprika ahumada y oregano; cocina la mezcla revolviendola ocasionalmente, hasta que los hongos eaten suaves, como 5 minutos. Apaga el fuego y dejalo enfriar.

Bate un huevo en un bol mediano, agrega la quinoa, la mezcla de hongos, la levadura nutricional y nueces; mezcla bien. Haz las hamburguesitas con la mano y ponlas en la bandeja de hornear.

Hornea las hamburguesitas hasta que eaten crujientes por fuera, de 25 a 30 minutos (dandoles la vuelta a los 20 minutos). Sírvelas con tu ensalada favorita y aderezo de mayonesa, albahaca y ajo (mezcla albahaca fresca picadita, un ajo machacado, jugo de 1 limon y mayonesa al gusto para hacer el aderezo)


Banana Cranberry Muffins (gluten-free)

IMG_7313

These muffins are great for breakfast. They’re moist and tart and go great with a bit of melted butter..and a bit of honey…and a cup of coffee..or tea, I don’t wanna limit you 🙂

for 15 muffins, you will need

2 ripe bananas, mashed

2 eggs

1/4 cup olive oil

1/3 cup coconut or almond milk

1/2 cup Erythritol (sugar substitute)

1 cup Bob’s Red Mill gluten free baking flour

1 1/2 cup gluten free oats

3 tsp baking powder

1/4 cup chopped almonds

1 cup fresh or frozen cranberries

1 tsp cinnamon

Preheat oven to 350F degrees. Line muffin pan with muffin paper cups.

IMG_7301

In a bowl, with a whisk, combine bananas, coconut milk, oil, erythritol and eggs. Add dry ingredients, flour, oats, cinnamon and baking powder and whisk until well incorporated. Fold in cranberries and almonds.

IMG_7306

With a spoon, fill each muffin cup 3/4 of the way. Bake for 25-30 minutes or until toothpick comes out clean when inserted in one muffin.

IMG_7325

——————————-

Estos muffins son perfectos para el desayuno. Son super suavecitos y aciditos por los arándanos. Van deliciosos con un poquito de mantequilla derretida..y miel…y una taza de cafe..o te, no te quiero limitar  🙂

para 15 muffins, vas a necesitar

2 guineos maduros, majados

2 huevos

1/4 taza de aceite de oliva

1/3 taza de leche de coco o almendra

1/2 taza de Erythritol (substituto de azúcar)

1 taza de harina para hornear gluten free marca  Bob’s Red Mill

1 1/2 taza de avena gluten free

3 cucharaditas de polvo de hornear

1/4 taza de almendras picadas

1 taza de cranberries (arandanos rojos) frescos o congelados

1 cucharadita de canela en polvo

Precalienta el horno a 350F degrees. Len el molde de muffins, coloca los copitos de papel.

En un bol, combina los guineos, leche de coco, aceite, erythritol y los huevos con un mezclador de mano. Luego agrega los ingredientes secos, harina, avena, canela y polvo de hornear y mezcla bien. Incorpora los arándanos y las almendras.

Con una cuchara, rellena cada molde de muffin hasta 3/4 de su capacidad. Hornea por 25-30 minutos o hasta que insertes un palillo en un muffin y salga limpio.

Chocolate Bark (sugar free)

photo 5

During the holidays I wanted to make something to give to my office peeps and found this yummy recipe online, which I adjusted a bit. Its no longer a holiday gift, Im making this one all the time now. My own homemade Gluten Free, Sugar Free chocolate!

You’ll need:

photo 1

300 grams of Semi Sweet baking chocolate (I use a sugar free version, but you can use the one you like)

1 tablespoon of organic unrefined coconut oil

1 tablespoon of coconut flakes

3 tablespoons of chopped dried cranberries

3 tablespoons of chopped pistachios

pink Himalayan salt, to taste

In a double boiler (I use a glass heat resistant bowl on top of a pot with boiling water), melt the chocolate with the coconut oil and coconut flakes.

photo 2

Pour into a tray lined with parchment paper and distribute evenly.

photo 4

Sprinkle with the cranberries, pistachios and a touch of Himalayan pink salt. Freeze for 2 hours and break into mid-size pieces

*Alternative recipe: Walnuts, coconut flakes, cranberries and orange zest

—————————————-

Corteza de Chocolate (sin azúcar)

En las fiestas de fin de año quise hacerle un detallito a mis amigos de la oficina y encontré esta receta súper rica en línea, la cual ajuste un poco. Ya no es un regalo de navidad, ahora lo hago todo el tiempo. Mi propio chocolate hecho en casa, sin gluten y sin azúcar!

Vas a necesitar:

300 gramos de Chocolate de cocina semiamargo (yo uso uno sin azúcar, pero puedes usar el que mas te guste)

1 cucharada de aceite de coco orgánico , no refinado

1 cucharada de coco rayado

3 cucharadas de arándanos secos picaditos

3 cucharadas de pistachos picaditos

sal rosada del Himalaya, al gusto

Pon los cuadritos de chocolate en baño maría (yo uso un bol de vidrio resistente al calor sobre una olla con agua hirviendo),

derrítelo con el aceite de coco y el coco rayado. Vierte la mezcla sobre una bandeja con papel pergamino y distribúyelo bien.

Échale los arándanos, pistachos y un toque de sal del Himalaya . Congélalo por 2 horas y rómpelo en piezas medianas.

*Receta alternativa: Nueces, coco rayado, arándanos y ralladura de naranja

derrítelo con el aceite de coco y el coco rayado. Vierte la mezcla sobre una bandeja con papel pergamino y distribúyelo bien.

Échale los arándanos, pistachos y un toque de sal del Himalaya . Congélalo por 2 horas y rómpelo en piezas medianas.

  • *Receta alternativa: Nueces, coco rayado, arándanos y ralladura de naranja

Coconut Lemon Balls

photo 3

Makes about 20 cookies

Ingredients:

  • 1-1/4 cups almond flour
  • 1 cup unsweetened shredded coconut (plus extra for rolling)
  • 2 tablespoons coconut flour
  • 1/4 teaspoon sea salt
  • 4 packets of stevia (I used Truvia)
  • 3 tablespoons coconut oil
  • 2 tablespoons fresh lemon juice
  • 1 tablespoon finely grated lemon zest
  • 1 teaspoon vanilla extract
  • 1 tsp chia seeds

Instructions:

In a food processor, process the almond flour, 1 cup shredded coconut, coconut flour, sea salt until finely ground. Add the truvia, coconut oil, lemon juice, lemon zest, chia seeds and vanilla. Process until a rough dough forms.

photo 1

Form the dough into 1-inch balls. Roll in shredded coconut Place the balls on a parchment-lined baking sheet.

photo 2

Bake at 250ºF for 20 minutes, rotating the pan halfway through. Cool completely. Store cookies in an airtight container in the refrigerator.

—————————————————–

Bolitas de coco y limón

Hace como 20 galletas

Ingredientes:

  • 1-1/4 tazas de harina de almendra
  • 1 taza de coco rayado sin endulzar (y extra para poner por fuera)
  • 2 cucharadas de harina de coco
  • 1/4 cucharadita de sal marina
  • 4 paquetes de stevia (utilice Truvia)
  • 3 cucharadas de aceite de coco
  • 2 cucharadas de jugo de limón recién exprimido
  • 1 cucharadita de ralladura de limón
  • 1 cucharadita de extracto de vainilla

1 cucharadita de semillas de chía

Instrucciones:

En un procesador, procesar la harina de almendras, 1 taza de coco rayado, harina de coco, sal marina hasta que este finamente molido. Agregar la truvia, aceite de coco, jugo y ralladura de limón, semillas de chía y vainilla. Procesar hasta que se haga una masa gruesa.

Formar bolitas de aproximadamente una pulgada y rodarlas por el coco rayado. Ponerlas en papel pergamino en una bandeja refractaria en el horno por 20 minutos a 250 grados. Darles la vuelta a los 10 minutos. Dejar enfriar completamente y ponerlas en un recipiente en el refrigerador.

Vegan Cheesy Kale Chips

photo 1

We bought a dehydrator when we had the organic vegetable basket delivery business a couple of years ago. Since we closed the business, we had it stored…until recently! Finally got a rack for the kitchen and a lot of appliances have crawled out of their caves (bread maker, ice cream machine, steamer, and the Excalibur a.k.a the dehydrator) So my first experiment went like this:

Ingredients

Vegan Cheesy Kale Chips

3 bunches of curly Kale

1/4 cup of Extra Virgin Olive Oil

Kosher Salt

Vegan Cashew Cheese

1 Cup salted cashews

1 Large Red Bell Pepper

1/2 Cup of Water

2 Tbs nutritional yeast

2 Lemons, juiced

2 Small dried Chipotle Peppers

1 Tbs Garlic Powder

1 Tsp Kosher Salt

 Instructions

For the Vegan Cashew Cheese:


Gather up all your ingredients and toss them into a food processor until smooth

 For the Cheesy Kale Chips

Wash that kale in salt water for 10 minutes. Then in a small bowl, pour in a little olive oil and a pinch of Kosher Salt.

Drain and dry the kale leaves very well. Take out the stem and try to leave big chunks of leaves. Then take each piece and dip it into the oil / salt. Lightly coating it. Then place the newly oiled kale leaf on a bowl. Stir in the Vegan Cashew Cheese and place chips in the dehydrator tray.

Turn dehydrator on at 115 degrees for about 6-8 hours . The timing will vary based on thickness of the cheese and the humidity. When they are dry enough stop the dehydrator and place all the chips in some zip lock bags or a glass storage containers.

photo 2

Chips de Kale con Queso Vegano

Compramos el deshidratador cuando teníamos el negocio de entrega a domicilio de vegetales orgánicos. Desde que cerramos el negocio, lo guardamos…hasta hace poco! Finalmente compramos un rack para la cocina y un poco de aparatos salieron de su cueva (maquina de hacer pan, maquina de hacer helado, y el Excalibur, también conocido como el deshidratador) Así que mi primer experimento fue así:

Ingredientes

Para los Chips de Kale

3 mazos de Kale

1/4 taza de aceite de olive extra virgen

Sal Kosher

Para el Queso Vegano

1 taza de pepitas de marañón saladas

1 pimentón rojo

1/2 Taza de Agua

2 cucharadas de nutritional yeast (levadura nutricional)

jugo de 2 limones

2 pimentones chipotle disecados

1 cucharada de polvo de ajo

1 cucharadita de sal kosher

Instrucciones

Para el Queso Vegano:


Mezcla todos los ingredientes en el procesador hasta lograr una mezcla homogénea

Para los Kale Chips

Lava el Kale en agua con sal por 10 minutos. En un Bol pequeño, mezcla el aceite con la sal .

Cuela y seca bien las hojas de kale. Sácales el tallo y deja trozos de kale de buen tamaño. Toma cada hoja y masajéala con el aceite de olive y ponlas en un bol aparte. Viérteles el queso vegano y distribúyelo en las hojas y ponlas en las bandejas del deshidratador.

Préndelo a 115 grados por 6-8 horas . EL tiempo va a depender en el espesor del queso. Cuando estén suficientemente secas, apaga el deshidratador y guarda los chips en bolsas ziplock o contenedores de vidrio.

Black Beans, Eggs & Anchovies

Serves 2

Image

So here’s another one for the Sunday brunch series. If you wondered what I did with the anchovies of the anchovy oil used in the Spanish Dressing …look no further

1 can of black beans (I used the small 10 oz can)

1 tablespoon of sriracha sauce with garlic

½ teaspoon of ground cumin

pinch of salt

4 eggs

6 anchovy fillets

cooking spray

freshly ground black pepper

Heat up the beans in a small pot, mix in the sriracha, cumin and salt. Heat up until liquid evaporates a bit (like 5 minutes).

Meanwhile, spray a pan with the cooking spray, add eggs and freshly ground black pepper. Cover and let cook until yolk is a bit set, but still runny.

Ladle the beans in a plate (making a nice bed for the eggs). Lay the eggs on top of the beans and crown with the the anchovy fillets. Amazing with toast or a baguette

Image

 —————————————————–

Frijoles Negros, Huevos & Anchoas

Comen 2

Aquí hay otra receta para la serie de los brunch dominicales. Si te preguntaste que hice con las anchoas del aceite de anchoa utilizado en el Aderezo Español…no busques mas

1 lata de frijoles negros (use la de 10oz)

1 cucharada de salsa sriracha con ajo

½ cucharadita de comino molido

pizca de sal

4 huevos

6 filetes de anchoa

spray de cocinar

pimienta negra recién molida

Calienta los frijoles en una ollita, mézclale la sriracha, comino y sal. Caliéntalos hasta que el liquido se evapore un poco (como 5 minutos).

Mientras tanto, ponle spray de cocinar a una sartén, agrega los huevos y pimienta fresca recién molida. Tápalos y deja cocinar hasta que las yemas estén un poco cocidas, pero todavía liquidas.

Pon una capa de frijoles en el fondo del plato (como una camita para los huevos). Coloca los huevos encima de los frijoles y corónalos con los filetes de anchoa. Delicioso con tostadas o baguette.

Eggs in hash brown nests

Image

I woke up this morning feeling like making a nice brunch and went for inspiration to food network. There she was, The Pioneer Woman, she’s a genius, check out her blog http://thepioneerwoman.com/cooking/

And there she was making these divine eggs in hash brown nests. Inspired, right there.

This is the perfect Sunday brunch recipe, cause you need time to make them. Don’t let the steps scare you, these are very easy to make and totally worth it. So these are the quantities I used to serve 2 people:

2 potatoes

4 eggs

salt and pepper to taste

cooking spray

Preheat the oven to 400 degrees.

Bake the potatoes until almost tender (potatoes should still have a little bite) 45 minutes . Allow to cool, and then peel and grate them. Season well with salt and pepper.

Image

INCREASE OVEN TEMP TO 425 DEGREES.

Spray a muffin pan generously with cooking spray. Divide the grated potato in 4 and put in 4 muffin cups. Use your fingers to gently press the sides and bottom in each muffin cup to make a nest (don’t press the potatoes firmly against the pan; they should sit lightly in the pan.) Spray again (very lightly!) with cooking spray. Bake for 15 to 20 minutes. Watch and make sure they do not burn. (If they seem like they’re not browning, kick up the temp to 450.) Remove when the nests are golden brown.

Image

Allow the nests to cool. Crack an egg into each one. Sprinkle with salt and pepper and bake until the whites are set, about 15 minutes.

Image

Remove from the muffin pan with a spoon or fork and serve (I served them with breakfast sausage links)

——————————————————–

Huevos en nidos de papa rayada

Esta mañana me desperté con ganas de hacer brunch y fui a buscar inspiración al foodnetwork. Ahí estaba la Pioneer Woman, es un genio, chequea su blog http://thepioneerwoman.com/cooking/

Y ahí estaba hacienda estos huevos divinos dentro de canastitas de papas rayadas. Inspirada, de una.

Esta es la receta perfecta para brunch del domingo, porque necesitas tiempo para hacerlas. No dejes que los pasos te asusten, son súper fáciles de hacer y valen la pena. Estas son las cantidades que use para 2 personas:

2 papas

4 huevos

sal y pimienta al gusto

spray para cocinar

Precalentar el horno a 400 grados.

Hornea las papas hasta que estén casi cocidas (deben estar un poquito duritas) como unos 45 minutos . Déjalas enfriar y luego pélalas y ráyalas. Sazona con sal y pimienta.

Sube la temperatura del horno a 425 grados.

Ponle el spray para cocinar a una bandeja para hacer muffins. Divide las papas en 4 y rellena 4 los moldecitos. Usa tus dedos para presionar levemente la papa rayada en el contorno de los moldesitos (no las aprietes mucho porque se hacen puré). Rocíale a las papas un poquito del spray de cocina y hornéalas de 15 a 20 minutos hasta que estén doraditas. Esta pendiente para que no se te vayan a quemar. Sacarlas del horno y dejar enfriar.

Échale un huevo encima a cada canastita , rocíale sal y pimienta y hornéalos hasta que estén hechos los huevos, como unos 15 minutos.

Sácalas del molde con una cuchara y sírvelas (yo las serví con salchichitas picantitas de desayuno)